The purpose of this lab is to:
- Get a lot more practice using and creating functions
- Get more practice with nested loops
- Get you started using objects (in this case, the Picture object)
- Learn how photo editing is done.
Image Manipulation
In this lab you'll create a nifty program that reads in an image and produces new images that are modifications of the original, as specified by the user. In doing so, you'll get more practice with nested for loops, while loops, creating methods and using objects.
You should start by making a lab05 folder and put the picture module and the file crayons.bmp in it. Unfortunately, the picture2 module that we used in some earlier labs can't handle what we need for this lab. Here is some updated documenntation for the picture module.
Describe the Problem:
Write a program called imageEdit.py that provides the user with image editing functionality.
input: Get a filename string from the user that represents the image they would like to edit.
output: Allow the user to edit the image given the provided editing options. Display their results to the screen and enjoy!
Understand the Problem:
Your program should be capable of the following operations:
- Copy
- Flip Horizontally
- Grayscale
- Scroll Horizontally
- Negate
- Zoom
- Posterize
- Rotate 180 Degrees
Examples of most of these operations are given below.
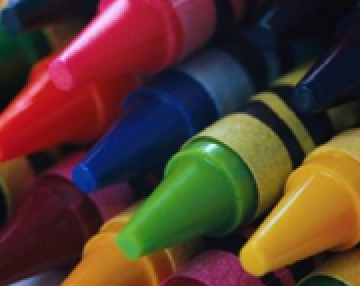
| Original Image: | |
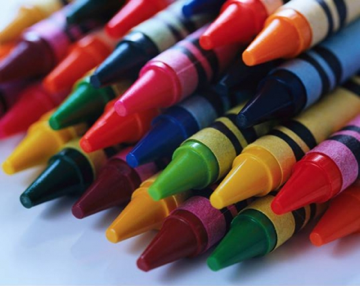 |
|
| Flip: | Scroll: |
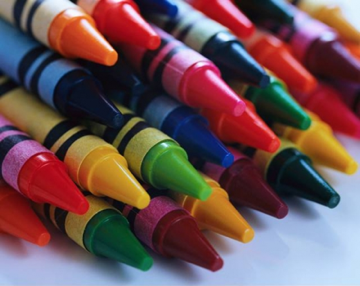 |
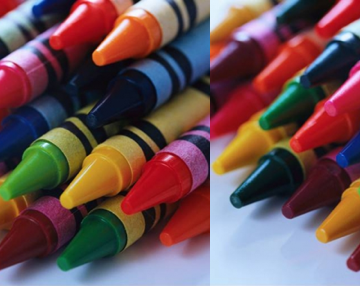 |
| Negative: | Zoom: |
 |
 |
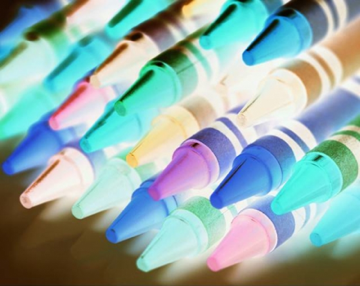
| Posterize: | Rotate 180: |
 |
 |
| Grayscale: | Blur: |
 |
 |
Design an Algorithm:
Your program should begin by printing a welcome to the user, informing them just how fortunate they are to have stumbled upon your very own image editor. You should then prompt the user in the console to pick a file to load.
Once you have an image loaded, display it. Then use a while loop to repeatedly print a table of possible operations, prompt the user to select one of these operations to apply to their image, apply the selected operation (create a distinct function for each operation), and display the resulting image. Each step should be applied to the original image and should produce a new picture object. You should ignore bad injput from the user rather than crashing on it. The program should end when the user enters "quit" instead of the name of an image operation. To make this easier to grade, here are the names of the commands you should use:
copy
flip
gray
scroll
negate
zoom
psterize
rotate
blur
Of course, this still leaves out the details of each operation, for which you will want to write pseudocode before you start writing functions. Some details are given below.
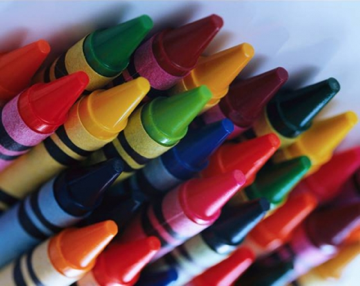
Copy: This is a place to start. Copy produces a new image that is the same size as the original, with the same color at each pixel.
Flip: This flips the image horizontally, taking the color from pixel (x, b) in the original to pixel (w-1-x, b) in the new image.
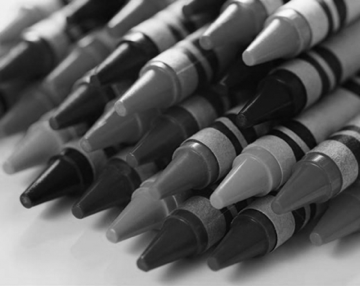
Grayscale: Shades of gray have the same red, green and blue value. There are many ways to convert a color value to a gray value. The way televisions convert a color signal to gray (which we call "black and white") is to let (r,g,b) be the color components of a pixel and let gray=0.299*r+0.587*g+0.114*b. Change the color of the pixel to (gray, gray, gray). The numbers 0.299, 0.587 etc. in this formula come from measurments of the average human eye sensitivity to different primary colors.
Scrolling: Scrolling should ask the user to specify some number of pixels, and should then shift the image that many to the right. Pixels that would fall off the edge of the image should wrap around to the other size. Modular arithmetic (the % operator) may come in handy here.
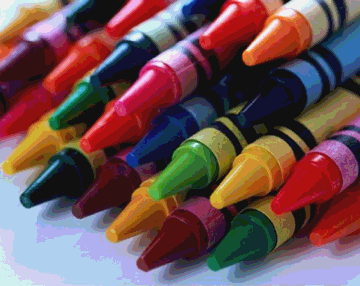
Negatives: The negative of an image is creating by inverting each color channel. So if the red value of a pixel were 255, it should become 0. If it were 254, it should become 1, and so on, down to 0, which should become 255. Similarly for green and blue.
Zoom: This method result in an image of the same size as the original, but consist of the center of the image blown up by a factor of 2. So if the image has width w and height h, zooming should expand the middle w/2 by h/2 region to fill the whole picture.
Posterize: A typical pixel can have one of 256 values for each color channel. In a posterized image, this number is drastically decreased. Each color channel value should be rounded to the nearest multiple of 64. In other words, the value of each channel must be one of 0, 64, 128, 192, 255.
Blur: When you blur an image, you set the color of each pixel to be the average of the 25 pixels in the 5 x 5 square centered at that pixel (i.e. the average of the original pixel and its original 24 neighbors). Be careful at the borders, not all pixels have 24 neighbors!
Implement a Design:
Think carefully about how to break your program into logical and managable pieces using functions. You will probably want to create one function for each of the image manipulation methods. It is very important that you test your code incrementally as you build your program -- don't try to write the whole thing before you start testing. It is also critical that you use comments to explain what each method you create does.
Since we're creating an image manipulation program, you'll want to save picture.py into your working directory. To create a new picture object, first add an import picture statement at the top of your program. Get a string fileName from the user. Then you'll be able to use
pic = picture.Picture(fileName)
where pic is just a variable name for the picture object (we used canvas last time, but you can use whatever name you want). This will crash if fileName is not the name of a file in the current folder, so put this inside a try/except block that handles bad input. Your program shouldn't crash, no matter what we type in for fileName.
The line pic=picture.Picture(fileName) causes a new picture object called pic to be created, but rather than starting as a blank image, pic is initialized to match the image in the indicated file. Each of the image manipulation functions you write needs to create a new image:
pic2 = picture.Picture(w,h)
will create a new blank image with width w and height h.
After you have created pic2 you can change the title that appears in the frame around the picture window with
pic2.setTitle( title_string )
You might have each of the image methods put its name on the window it creates.
When you have finished drawing pic2 you should make it appear with
pic2.display( )
The image file you use must be in your working directory. You can use crayons.bmp or an image of your choice, although I suggest sticking with images which are in .bmp format. If you're looking for files on Google images, you can add filetype:bmp to your query to restrict hits to this file type.
Some Important Methods
The following methods will be useful in completing this lab. For starters, you often won't know the height and width of the image you read in. To find out, the methods getHeight() and getWidth() can be used. Both return an integer. Remember that to call these methods, you'll use the object name, followed by a period, followed by the method invocation. For example, w = pic.getWidth(). Keep in mind that if the width of the image is w, then the x-coordinates of all pixels range from 0 to w-1. Trying to access or modify a pixel with an x-coordinate of w or greater will cause an error. Similarly for the height.
Since we'll be doing pixel-by-pixel modifications, we need to be able to read and set the three color channels of any given pixel. The method getPixelRed(x, y) returns the red value of the pixel at location (x,y). The method setPixelRed(x, y, v) assigns the pixel at (x,y) a red value of v. This method does not return a value.
The methods getPixelGreen(x,y), setPixelGreen(x,y,v), getPixelBlue(x,y) and setPixelBlue(x,y,v) behave as you'd expect. Keep in mind that when setting any color value, you must use an integer in the range from 0 to 255 (inclusive). It'll often simplify your code to use getPixelColor(x,y) (which returns three integers, one per color channel) and setPixelColor(x,y,r,g,b). The method display() can be used to make the current contents of a Picture object apear on the screen.
As we said abve, the method setTitle(s) can be used to change to string s the title printed in the window frame.
Suppose pic is the Picture variable that hold the user's initial image. For each of the image manipulation methods you need to write a function that takes pic, creates a new Picture pic2 the same size as pic, modifies its pixels, and then returns pic2. For example, the copy function will start
	def copy(pic):
		w = pic.getWidth()
		h = pic.getHeight()
 		pic2 = picture.Picture(w, h)
 			## run through the pixels of pic<
			## and set the corresponding pixels of
			## pic2 to the same color
		return pic2
The function that reads user input and calls the manipulation functions needs to take the returned pic2 and display it. This function also needs to keep a reference to this picture object, or else Python's garbage collection system will eat it. I find that the easiest way to avoid this is to save each picture in a list. This leads to code like the following:
	if choice == "flip":
		p = flip(pic)
		p.display()
		wins.append(p)
	elif choice == "flip":
			#and so forth
Remember that before you start the input loop, variable wins needs to be initialized to an empty list.
Test the Program:
Hopefully you've been testing as you go along. Make sure each individual operation does what it is supposed to, and then make sure that overall program works as well.
Handin
If you followed the Honor Code in this assignment, insert an HonorCode file attesting to the fact into your lab05 folder:
I affirm that I have adhered to the Honor Code in this assignment.
You now just need to electronically handin all your files. As a reminder
     % cd             # changes to your home directory
     % cd cs150       # goes to your cs150 folder
     % handin         # starts the handin program
                      # class is 150
                      # assignment is 4
                      # file/directory is lab04
     % lshand         # should show that you've handed in something
You can also specify the options to handin from the command line
     % cd ~/cs150     # goes to your cs150 folder
     % handin -c 150 -a 4 lab04
File Checklist
You should have submitted the following files:
   picture.py   (for ease of grading)
   crayons.bmp	(for ease of grading)
   imageEdit.py
	 HonorCode
If you worked with a partner, they should submit mastermind.py and imageEdit.py, and you should submit a README with their name.
Last revised August 2017 T. Wexler, A. Sharp, C. Taylor, R. Geitz